...at an AWS event
Running the workshop at an AWS Event
Only complete this section if you are at an AWS hosted event (such as re:Invent, Kubecon, Immersion Day, or any other event hosted by an AWS employee). If you are running the workshop on your own, go to: Start the workshop on your own.
Login to the AWS Workshop Portal
If you are at an AWS event, an AWS account was created for you to use throughout the workshop. You will need the Participant Hash provided to you by the event’s organizers.
- Connect to the portal by browsing to https://dashboard.eventengine.run/.
- Enter the Hash in the text box, and click Proceed
- In the User Dashboard screen, click AWS Console
- In the popup page, click Open Console
You are now logged in to the AWS console in an account that was created for you, and will be available only throughout the workshop run time.
In the interest of time for shorter events we sometimes deploy the resources required as a prerequisite for you. If you were told so, please review the cloudformation outputs of the stack that was deployed by expanding the instructions below.
What resources are already deployed
We have deployed the below resources required to get started with the workshop using a CloudFormation Template (eks-spot-workshop-quickstarter-cnf.yml), Please reference the below resources created by the stack.
-
An AWS Cloud9 workspace with
- An IAM role created and attached to the workspace with Administrator access
- Kubernetes tools installed (kubectl, jq and envsubst)
- awscli upgraded to v2
- Created and imported a key pair to Amazon EC2
- eksctl installed, The official CLI for Amazon EKS
-
An EKS cluster with the name
eksworkshop-eksctland a EKS managed node group with 2 on-demand instances.
Use your resources
In this workshop, you’ll need to reference the resources created by the CloudFormation stack that we setup for you.
-
On the AWS CloudFormation console, select the stack name that starts with mod- in the list.
-
In the stack details pane, click the Outputs tab.
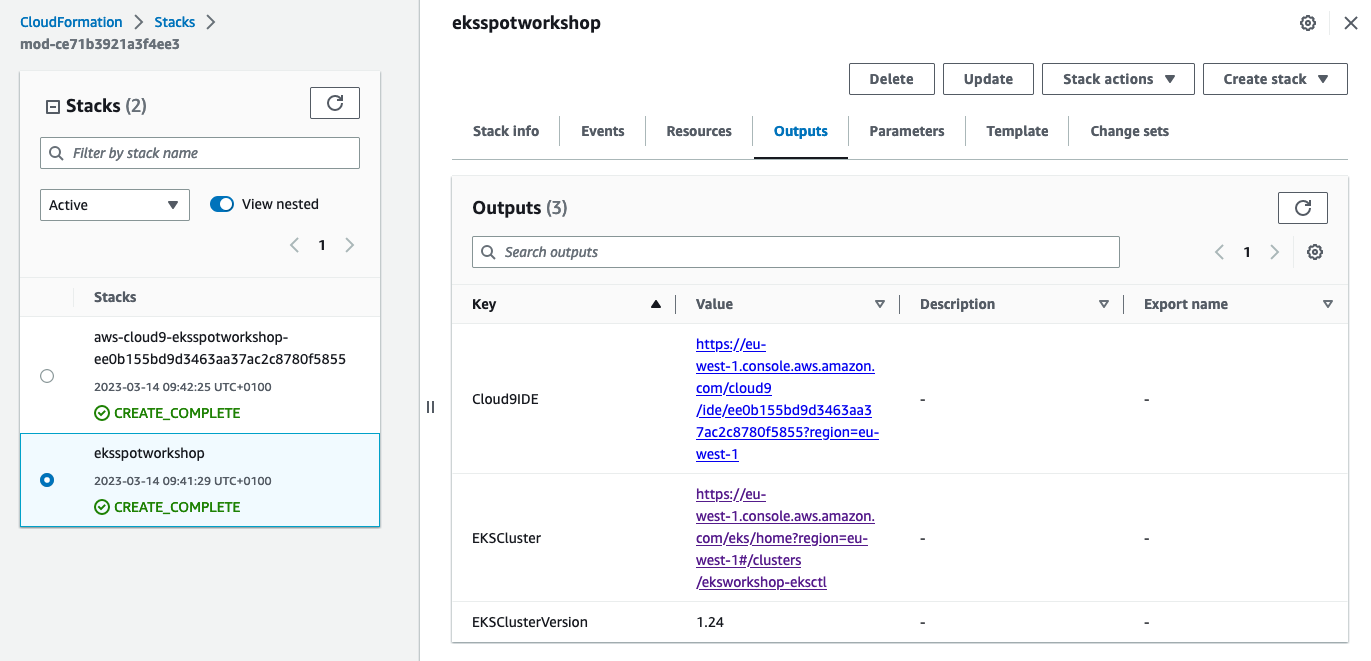
It is recommended that you keep this window open so you can easily refer to the outputs and resources throughout the workshop.
you will notice additional Cloudformation stacks were also deployed which is the result of the stack that starts with mod-. One to deploy the Cloud9 Workspace and two other to create the EKS cluster and managed nodegroup.
Launch your Cloud9 workspace
- Click on the url against
Cloud9IDEfrom the outputs
-
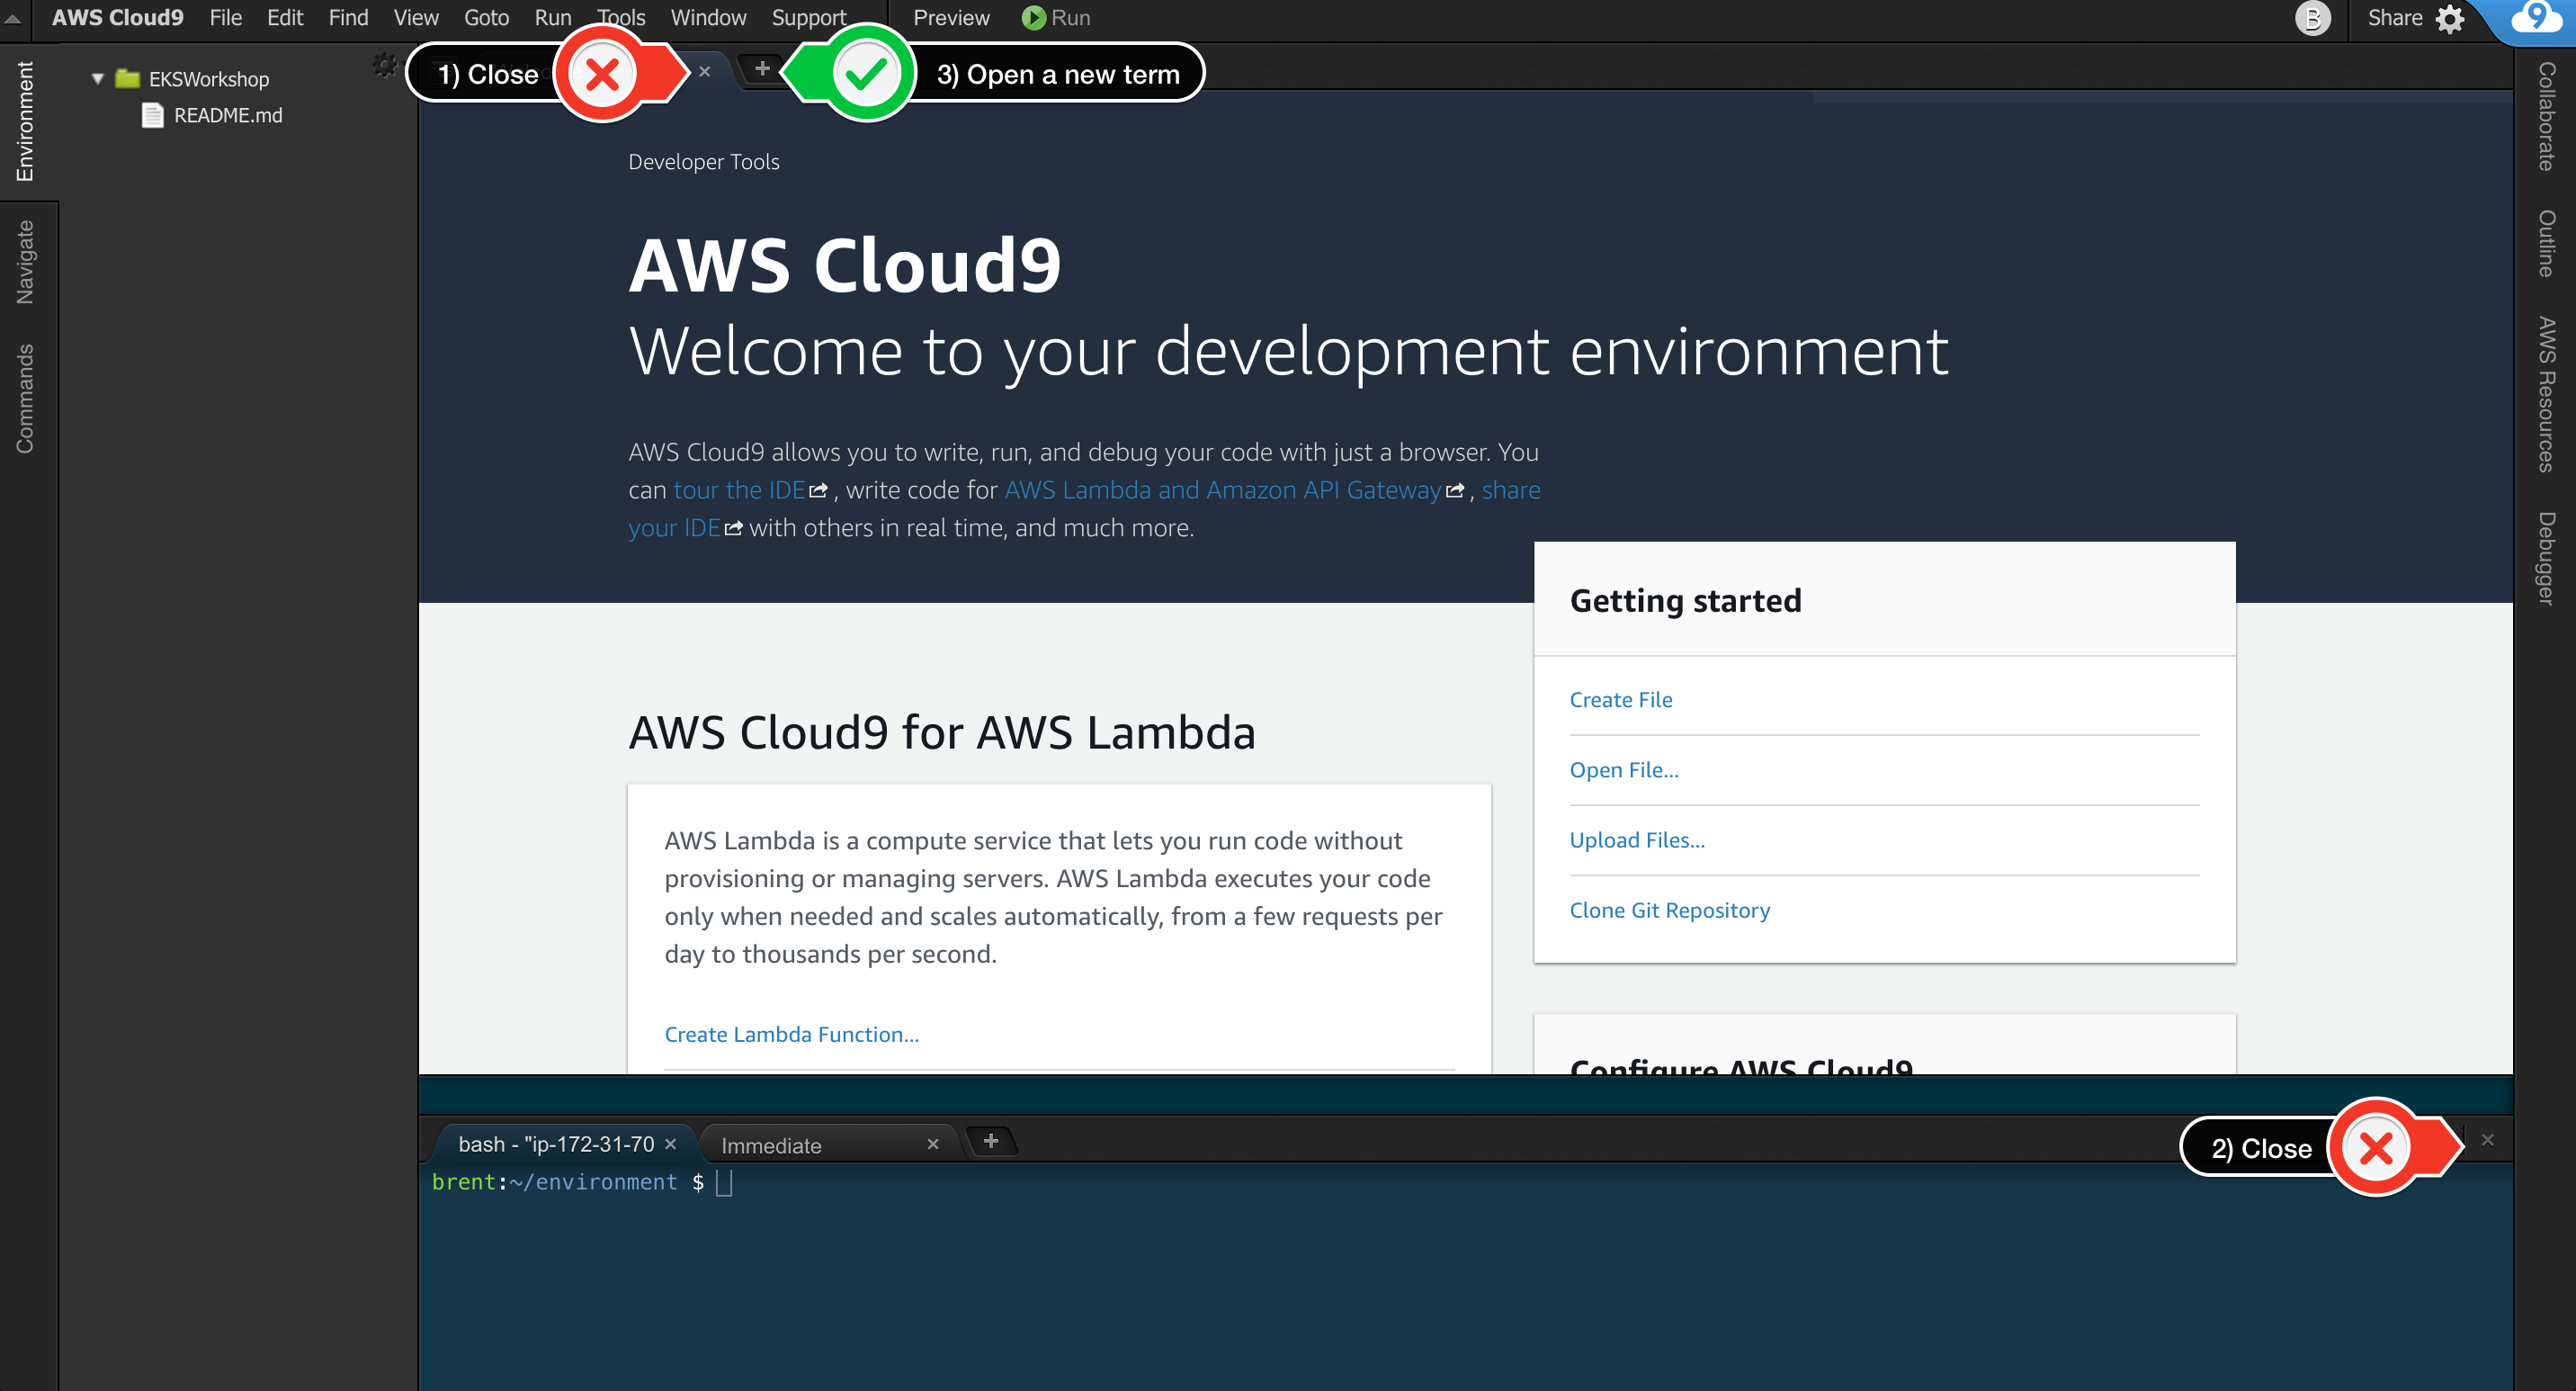
When it comes up, customize the environment by closing the welcome tab and lower work area, and opening a new terminal tab in the main work area:
-
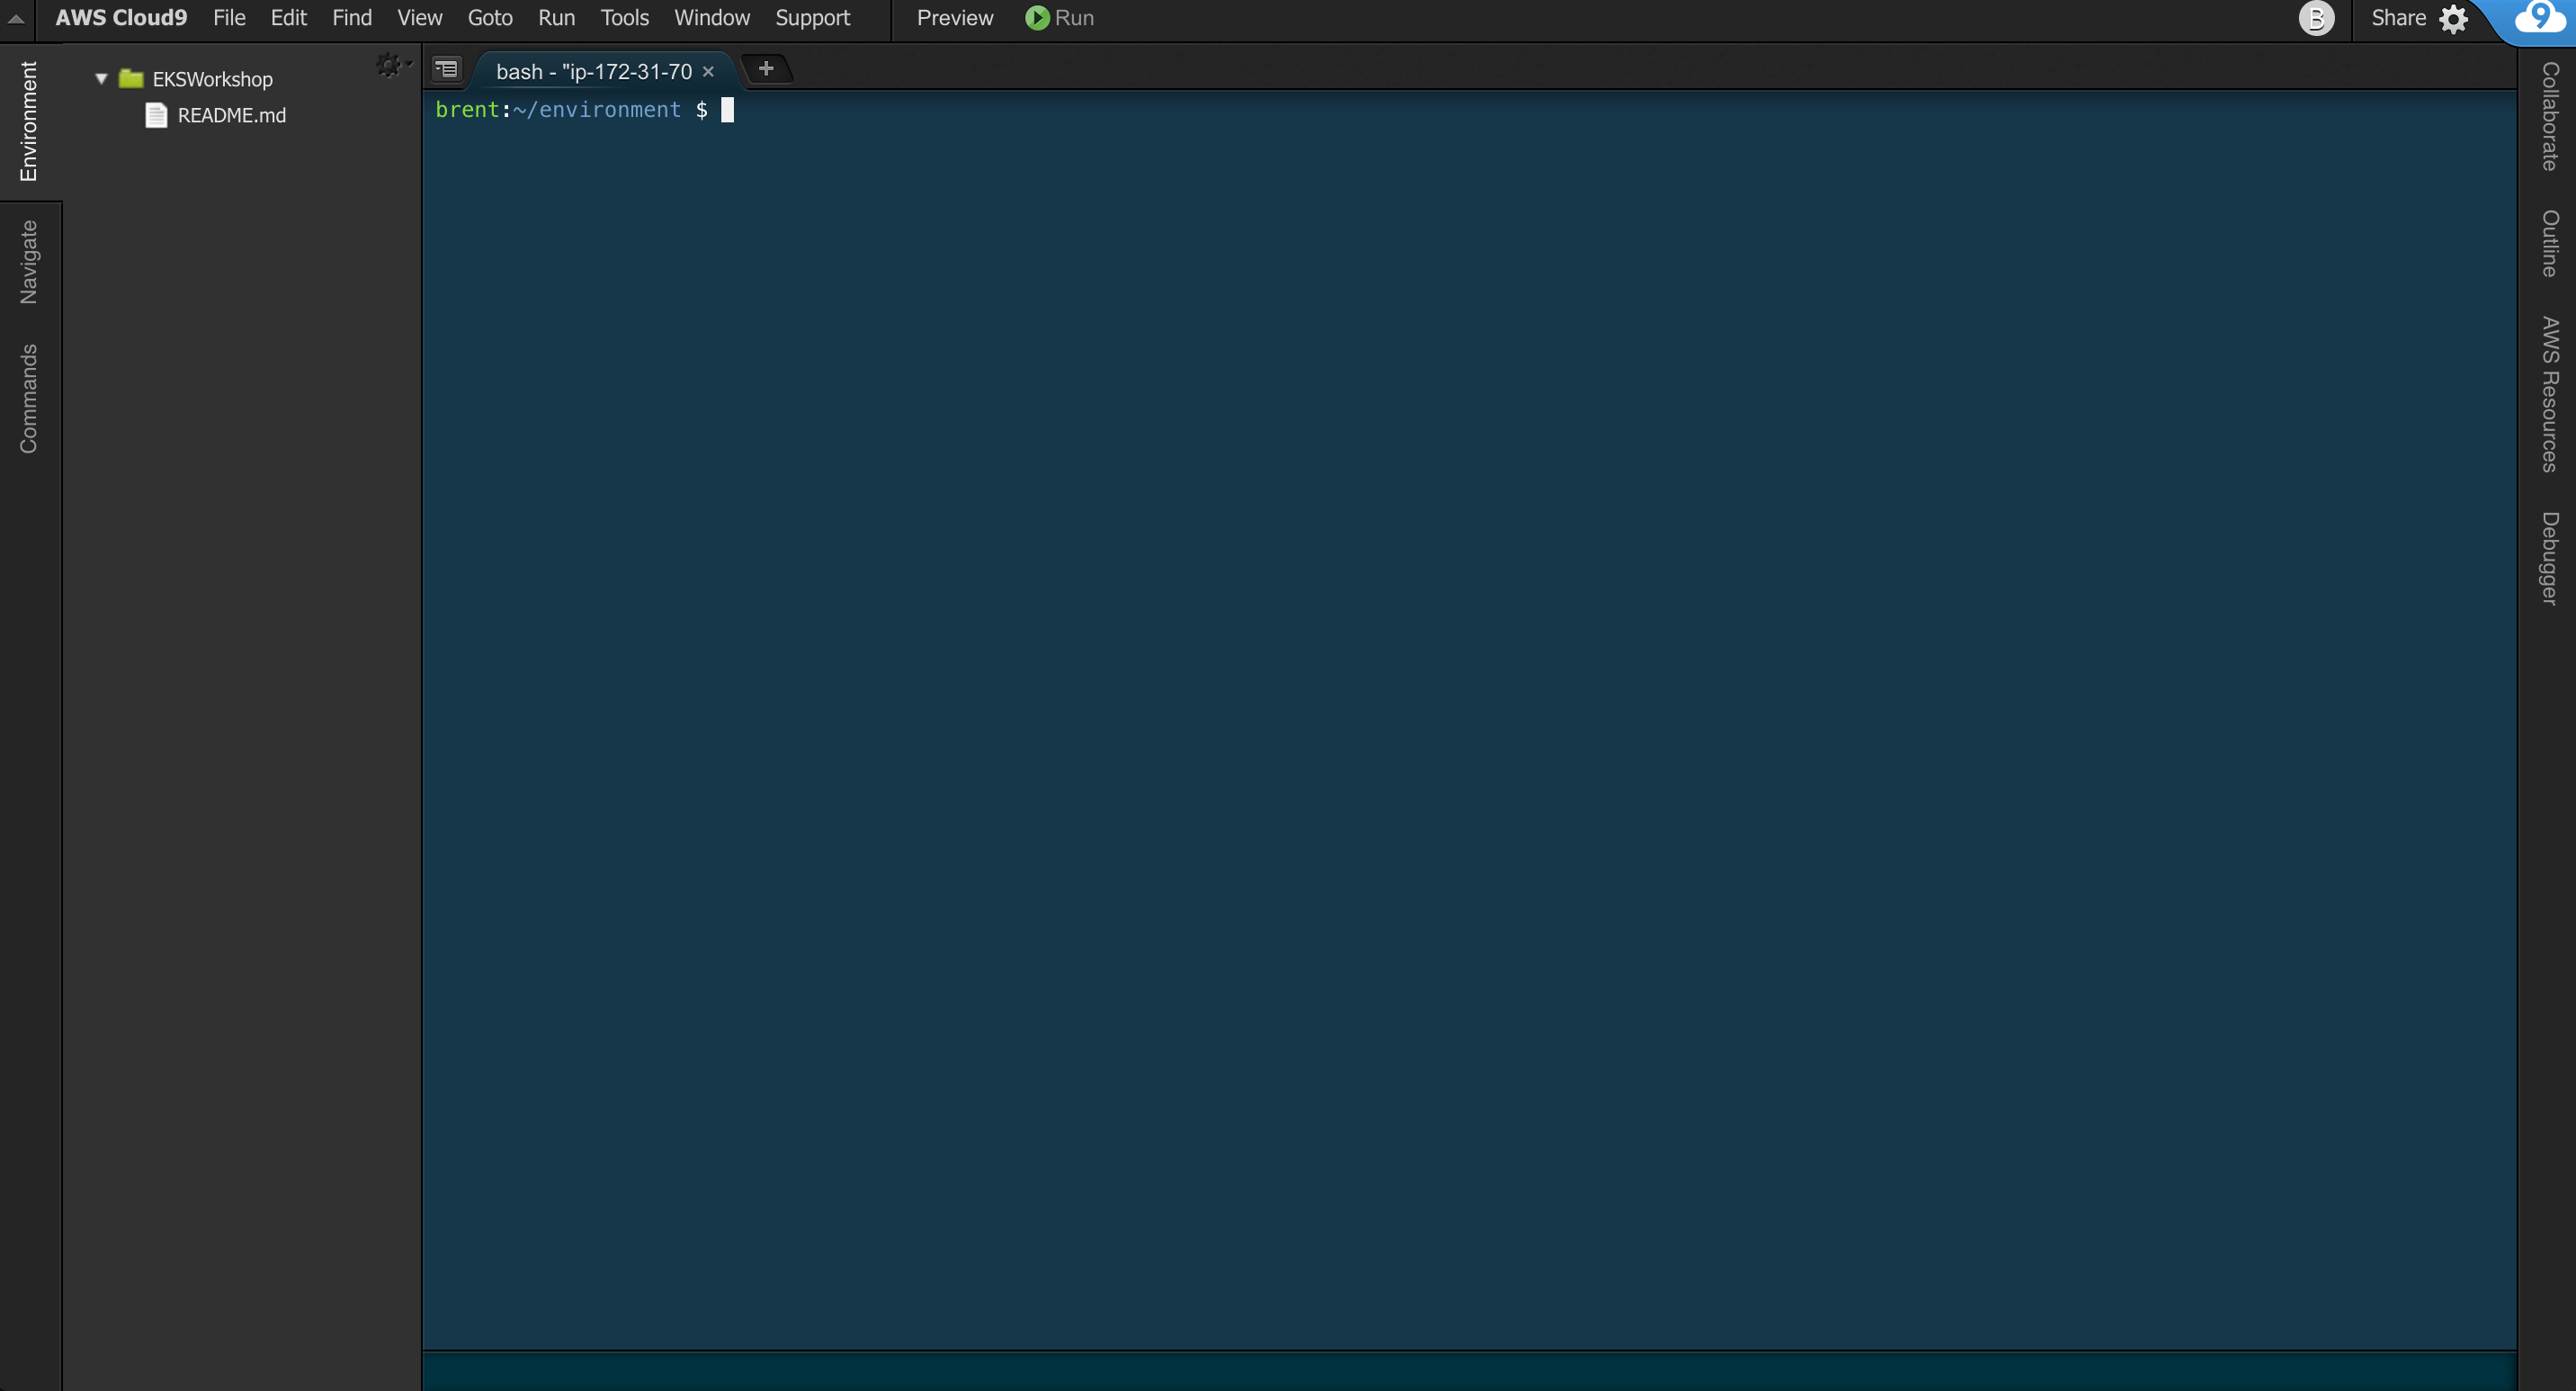
Your workspace should now look like this:
-
If you like this theme, you can choose it yourself by selecting View / Themes / Solarized / Solarized Dark in the Cloud9 workspace menu.
Note: Cloud9 normally manages IAM credentials dynamically. This isn’t currently compatible with the EKS IAM authentication, so we will disable it and rely on the IAM role instead. To do so, run the following commands in the Cloud9 workspace:
aws cloud9 update-environment --environment-id ${C9_PID} --managed-credentials-action DISABLE
rm -vf ${HOME}/.aws/credentials
You are now ready to Test the Cluster