Workshop Preparation
Log in to AWS Cloud9 environment
You can execute the steps of this workshop directly on your workstation, but then you will need to make sure that you have the command-line tools for Git, Terraform, kubectl and AWS CLI installed. Instead of that, to not change any local settings, we recommend to use AWS Cloud9: a cloud IDE where you can get access to the terminal and install all the required tools.
A Cloud9 environment has already been provisioned for you in the CloudFormation template (created in the Starting the workshop section). You will now log in to it and do the final configuration steps: disable the AWS managed temporary credentials and download the required workshop files.
- In the AWS Console enter Cloud9 in the search box at the top of the screen and open the service.
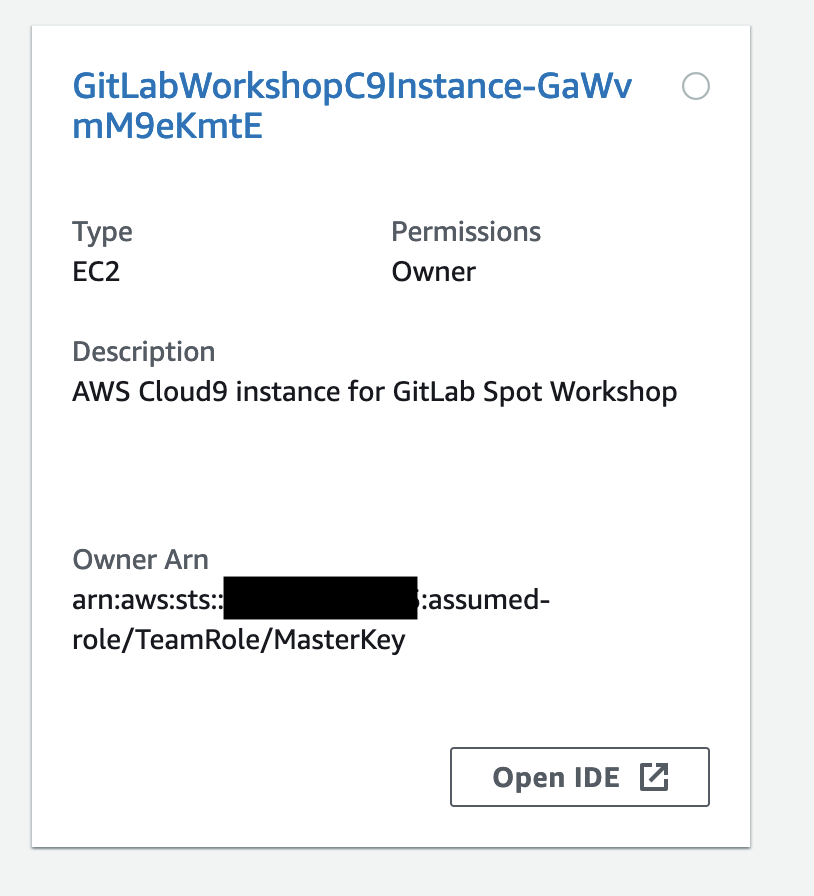
- On the Your environments page find the environment called like
GitLabWorkshopC9Instance-...and click the Open IDE button for it.
-
When the environment comes up, close all tabs inside it and open a new terminal by clicking + > New Terminal.
-
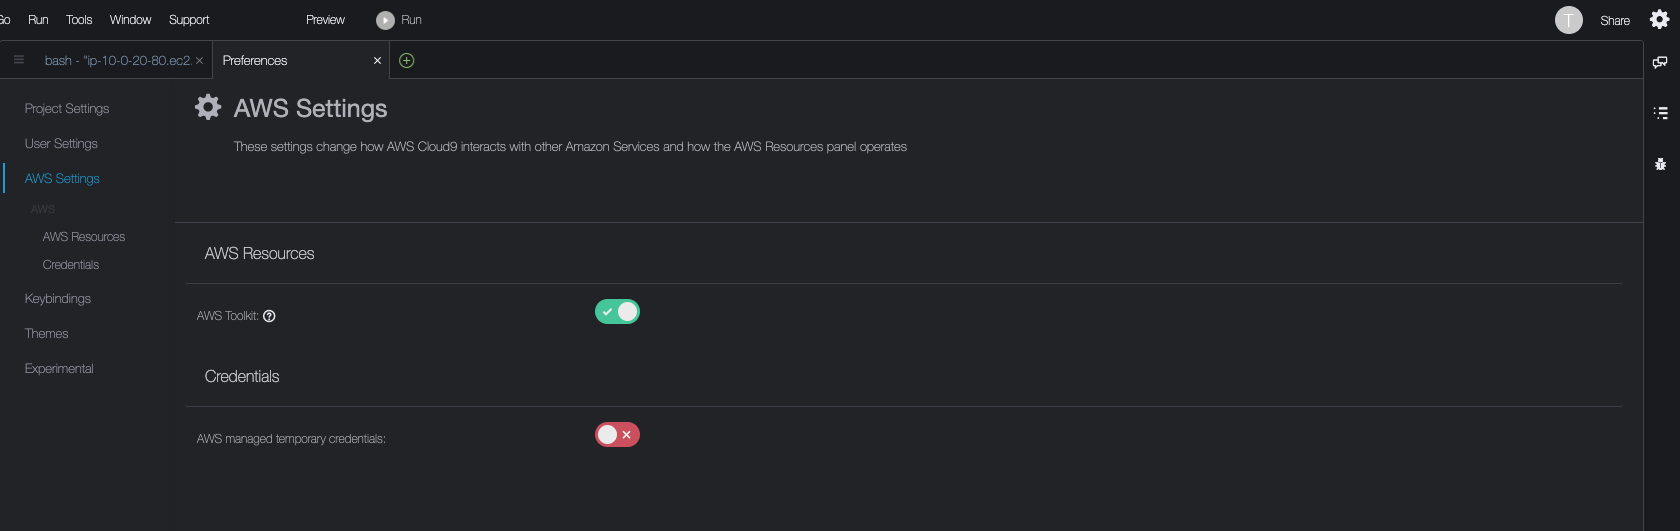
Open preferences tab by choosing the cogwheel icon at the top-right corner of the screen. Then choose AWS Settings in the navigation pane.
-
Disable AWS managed temporary credentials toggle:
- Close the Preferences tab and in the terminal tab, execute the following command to verify that you are using the correct role (in the output you should see
GitLabWorkshopC9Roleand greenOK):
aws sts get-caller-identity --query Arn | grep GitLabWorkshopC9Role && echo -e "\033[0;32mOK\033[0m" || echo -e "\033[0;31mNOT OK\033[0m"

- During the workshop, you will need to refer to the identifiers of the resources created by the CloudFormation stack you deployed. To reduce copy and paste across the CloudFormation console and the Cloud9 environment, you will load the CloudFormation Stack Outputs to environment variables. Configure the stack_name environment variable with the name of your CloudFormation template (substitute the
mod-gitlab-spot-workshopwith the actual stack name that you created / identified in the Starting the workshop section):
export stack_name=mod-gitlab-spot-workshop
- Now, load the CloudFormation stack outputs on environment variables running the following commands:
export AWS_REGION=$(curl --silent http://169.254.169.254/latest/dynamic/instance-identity/document | jq -r .region)
for output in $(aws cloudformation describe-stacks --stack-name $stack_name --query 'Stacks[].Outputs[].OutputKey' --output text)
do
	export $output=$(aws cloudformation describe-stacks --stack-name $stack_name --query 'Stacks[].Outputs[?OutputKey==`'$output'`].OutputValue' --output text) >>  ~/.bash_profile
	eval "echo $output : \"\$$output\""

	eval "echo export $output=\"\$$output\""  >>  ~/.bash_profile
done
.  ~/.bash_profile
If successful, the output should be similar to the following:
Subnet1 : subnet-0225d837e8401e3a7
VPC : vpc-0cef9a85fe90459e6
GitLabPassword : 5HfKdkUxc880EDnV
GitLabURL : https://d1in48s0v2ygmm.cloudfront.net
GitLabCacheBucket : mod-gitlab-spot-workshop-gitlabcachebucket-aoggbfq6go76
Subnet1Zone : us-east-1a
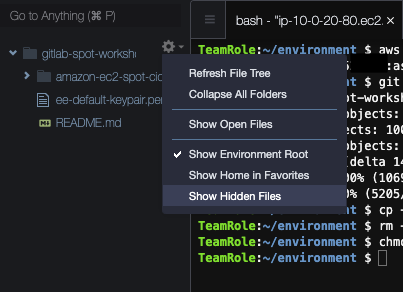
- Finally, enable Cloud9 to show hidden files (you will need it to modify the scripts of GitLab CI/CD later). To do this choose the small cogwheel icon right above the file tree and choose Show Hidden Files if it has not been enabled yet (if there is a tick to the left of it, do not click again, as it will disable the display of hidden files):
You are now ready to start the main sections of the workshop! Please proceed to Create a GitLab repository.