...On your own
 Please note: This workshop version is now deprecated, and an updated version has been moved to AWS Workshop Studio. This workshop remains here for reference to those who have used this workshop before for reference only. Link to updated workshop is here: Efficient and Resilient Workloads with Amazon EC2 Auto Scaling.
Running the workshop self-paced, in your own AWS account
If you are at an AWS Event, please skip this step!
To avoid unwanted costs in your account, don’t forget to go through the Cleanup step when you finish the workshop, or if you deploy the CloudFormation template but don’t complete the workshop.
To complete this workshop, you need access to an AWS account with administrative permissions. An IAM user with administrator IAM access policy (arn:aws:iam::aws:policy/AdministratorAccess) or equivalent IAM access policy is required.
Deploy CloudFormation Stack
To save time on the initial setup, you deploy a CloudFormation template to create various supporting resources including IAM policies and roles, EC2 Launch Template, VPC, Subnets and a Cloud9 IDE environment for you to run the steps for the workshop in.
- You can view and download the CloudFormation template from GitHub here. (Tip:
Right clickthe link andSave Link As, to download the file.). Take a moment to review the CloudFormation template so you understand the resources it will be creating. - Browse to the AWS CloudFormation console and click Create stack, then With new resources(standard).
- In the Specify template section, select Upload a template file. Click Choose file and, select the template you downloaded in step 1 and click Next.
- In the Specify stack details section, enter a Stack name and click Next. (Tip: The stack name cannot contain space, use
myEC2Workshopfor example.) - In Configure stack options, you don’t need to make any changes and click Next.
- Review the information for the stack. At the bottom under Capabilities, select I acknowledge that AWS CloudFormation might create IAM resources. When you’re satisfied with the settings, click Create stack.
The CloudFormation stack takes about 45 minutes for the environment setup and the bootstrap script to finish creating the CloudWatch metrics data.
Login to AWS Cloud9 IDE
- On the AWS CloudFormation console, select the stack in the list.
- In the stack details pane, click the Events tab.
- Click the refresh button to update the events in the stack creation
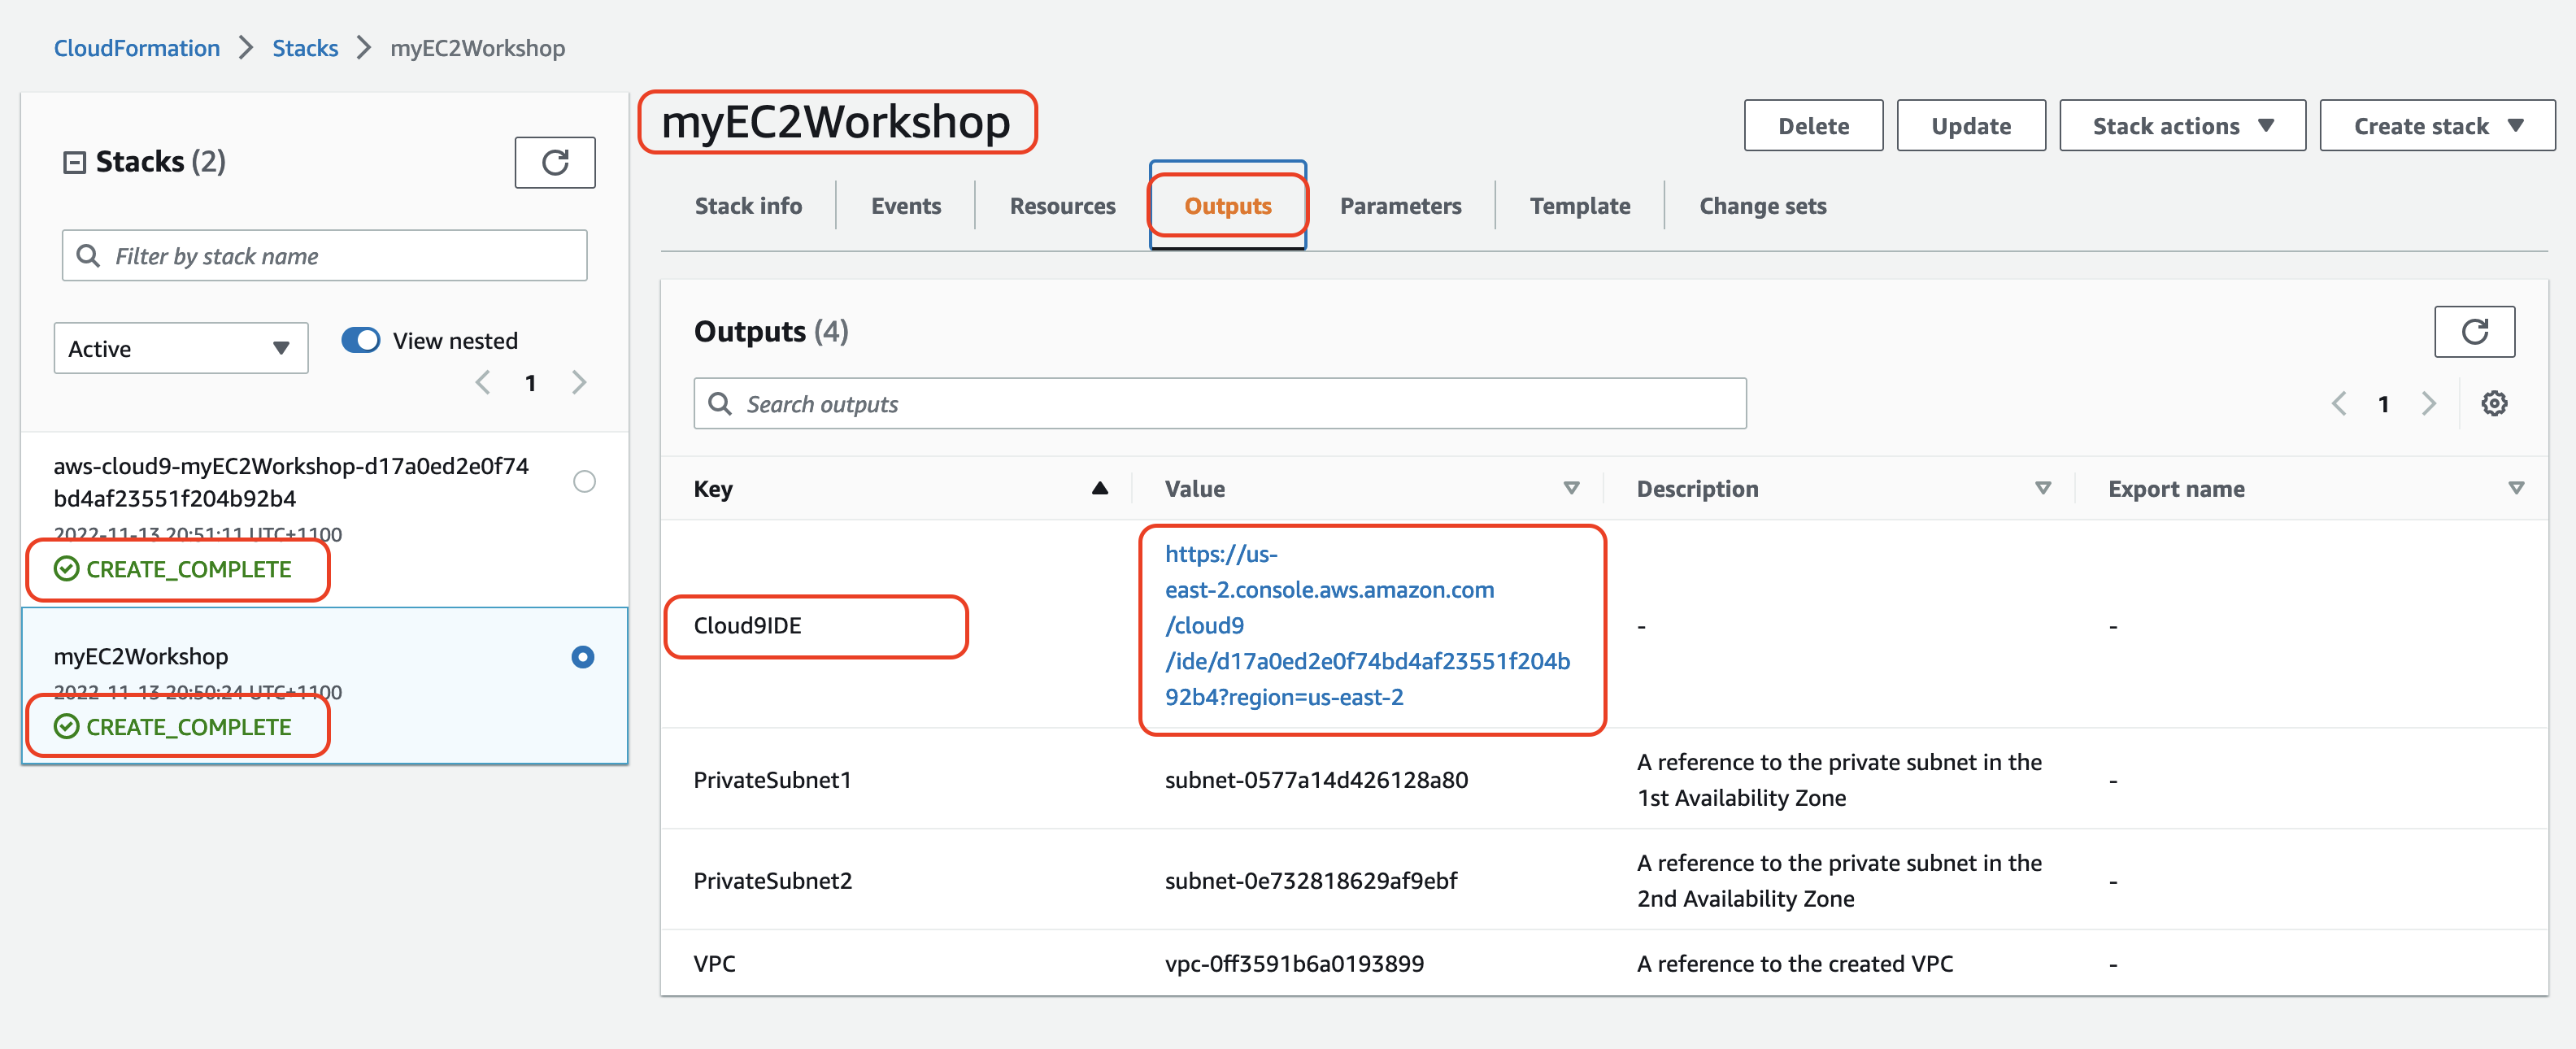
- When AWS CloudFormation has successfully created the stack, you will see the CREATE_COMPLETE event at the top of the Events tab.
- In the stack details pane, click the Outputs tab.
- Click on the url of the AWS Cloud9 environment, it’s the value of Cloud9IDE in the CloudFormation stack outputs.
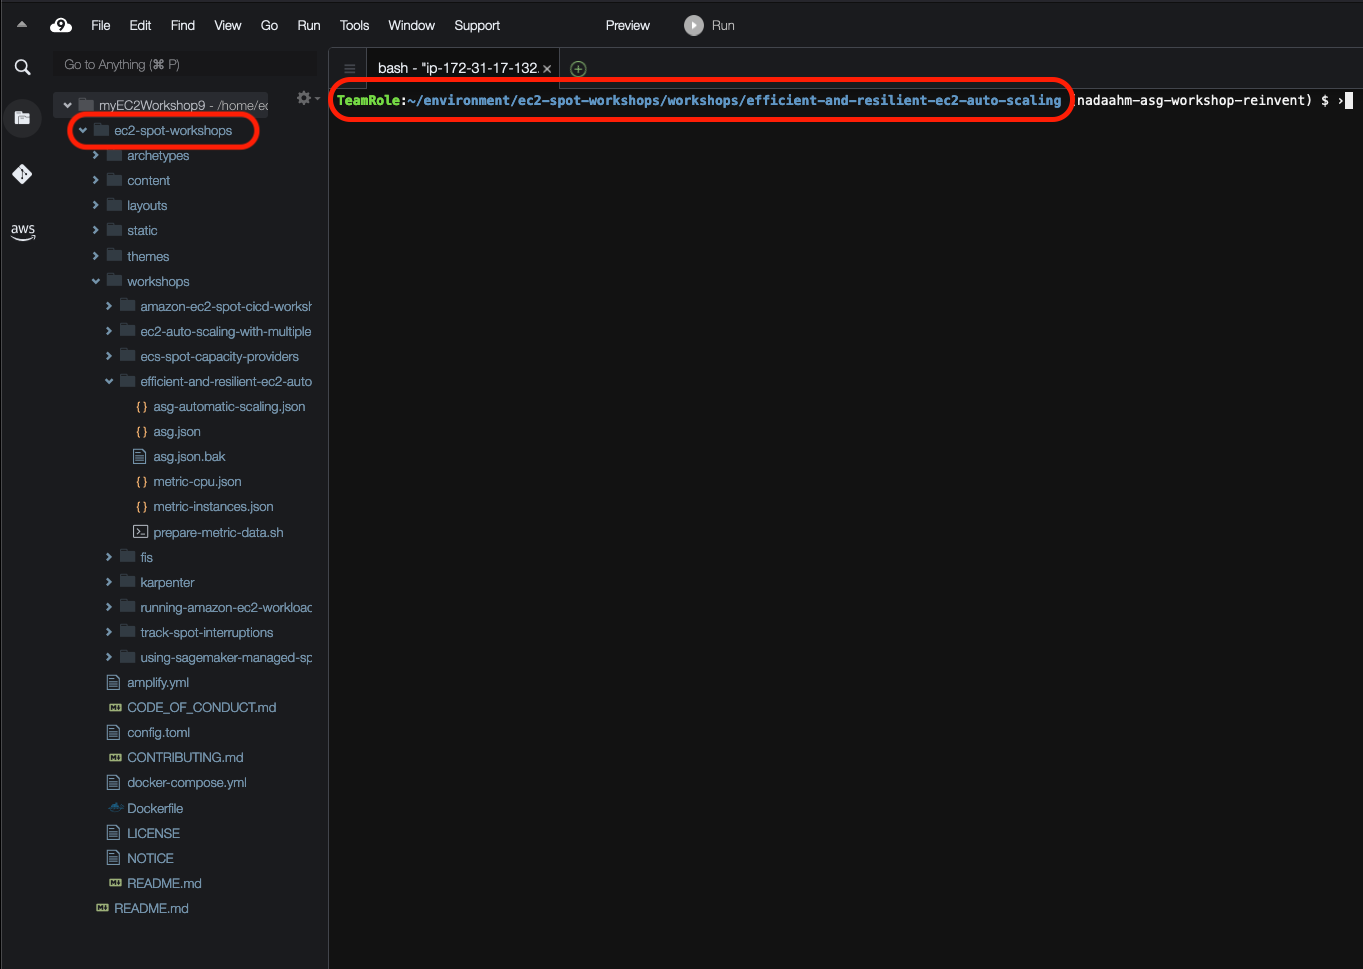
- In the Cloud9 IDE, check the folders in left navigation, look for folder named ec2-spot-workshops, confirm it exists.
- In the Cloud9 terminal, change into the workshop directory
cd ec2-spot-workshops/workshops/efficient-and-resilient-ec2-auto-scaling