Deploy the Microservice
 Please note: this EKS and Karpenter workshop version is now deprecated since the launch of Karpenter v1beta, and has been updated to a new home on AWS Workshop Studio here: Karpenter: Amazon EKS Best Practice and Cloud Cost Optimization.
This workshop remains here for reference to those who have used this workshop before, or those who want to reference this workshop for running Karpenter on version v1alpha5.
Monte Carlo Pi Microservice
We are now ready to deploy our application. This time around we will deploy both a Service and a Deployment to serve our Monte Carlo microservice. We will apply all the techniques that we’ve seen in the previous Karpenter section.
Let’s create a template configuration file for monte carlo pi application:
cd ~/environment
cat <<EoF > monte-carlo-pi-service.yaml
---
apiVersion: v1
kind: Service
metadata:
  name: monte-carlo-pi-service
  annotations:
    service.beta.kubernetes.io/aws-load-balancer-type: external
    service.beta.kubernetes.io/aws-load-balancer-nlb-target-type: ip
    service.beta.kubernetes.io/aws-load-balancer-scheme: internet-facing
    service.beta.kubernetes.io/aws-load-balancer-manage-backend-security-group-rules: "true"
spec:
  type: LoadBalancer
  ports:
    - port: 80
      targetPort: 8080
  selector:
    app: monte-carlo-pi-service
---
apiVersion: apps/v1
kind: Deployment
metadata:
  name: monte-carlo-pi-service
  labels:
    app: monte-carlo-pi-service
spec:
  replicas: 2
  selector:
    matchLabels:
      app: monte-carlo-pi-service
  template:
    metadata:
      labels:
        app: monte-carlo-pi-service
    spec:
      nodeSelector:
        intent: apps
        kubernetes.io/arch: amd64
        karpenter.sh/capacity-type: spot
      containers:
        - name: monte-carlo-pi-service
          image: ${MONTE_CARLO_IMAGE}
          resources:
            requests:
              memory: "512Mi"
              cpu: "1024m"
            limits:
              memory: "512Mi"
              cpu: "1024m"
          securityContext:
            privileged: false
            readOnlyRootFilesystem: true
            allowPrivilegeEscalation: false
          ports:
            - containerPort: 8080
EoF
kubectl apply -f monte-carlo-pi-service.yaml
This should create a monte-carlo-pi-service.yml template file that defines a Service and a Deployment. The configuration instructs the cluster to deploy two replicas of a pod with a single container, that sets up Resource request and limits to a fixed value ~0.5vCPUs and 1024Mi of RAM.
Let’s understand what happens when applying this configuration.
Challenge
You can use Kube-ops-view or just plain kubectl cli to visualize the changes and answer the questions below. In the answers we will provide the CLI commands that will help you check the resposnes. Remember: to get the url of kube-ops-view you can run the following command kubectl get svc kube-ops-view | tail -n 1 | awk '{ print "Kube-ops-view URL = http://"$4 }'
Answer the following questions. You can expand each question to get a detailed answer and validate your understanding.
1) How many replicas would be created and which type of nodes would they be assigned to ?
By now we should be quite familiar with answering this question, right.
The number of replicas has been defined in the manifest and has been set to 2.
As for the type of nodes:
- There was no
nodeSelectorset forkarpenter.sh/provisioner-name, which means we are expecting Karpenter to use the default Provisioner. To remind ourselves of what was the configuration of thedefaultProvisioner we can run.
kubectl describe provisioner default
-
There a nodeSelector for the
kubernetes.io/archset toamd64well-known label. If you check the compilation steps fo the microservice we just created, we did only push theamd64version of it. -
There are nodeSelector defined for
intet:appsso that the application does not get deployed into the OnDemand Managed Node groups. -
There is also a nodeSelector for
karpenter.sh/capacity-type: spot. We are expecting all the instances to be of Spot type.
We can confirm the statements above by checking Karpenter logs using the following command. By now you should be very familiar with the log lines expected.
alias kl='kubectl -n karpenter logs -l app.kubernetes.io/name=karpenter --all-containers=true -f --tail=20'
kl
Or by runnint the following command to verify the details of the Spot instance created.
kubectl describe node $(kubectl get node --selector=intent=apps,karpenter.sh/capacity-type=spot -o json | jq ".items[].metadata.name"| sed s/\"//g)
2) How can you get access to the Service URL ?
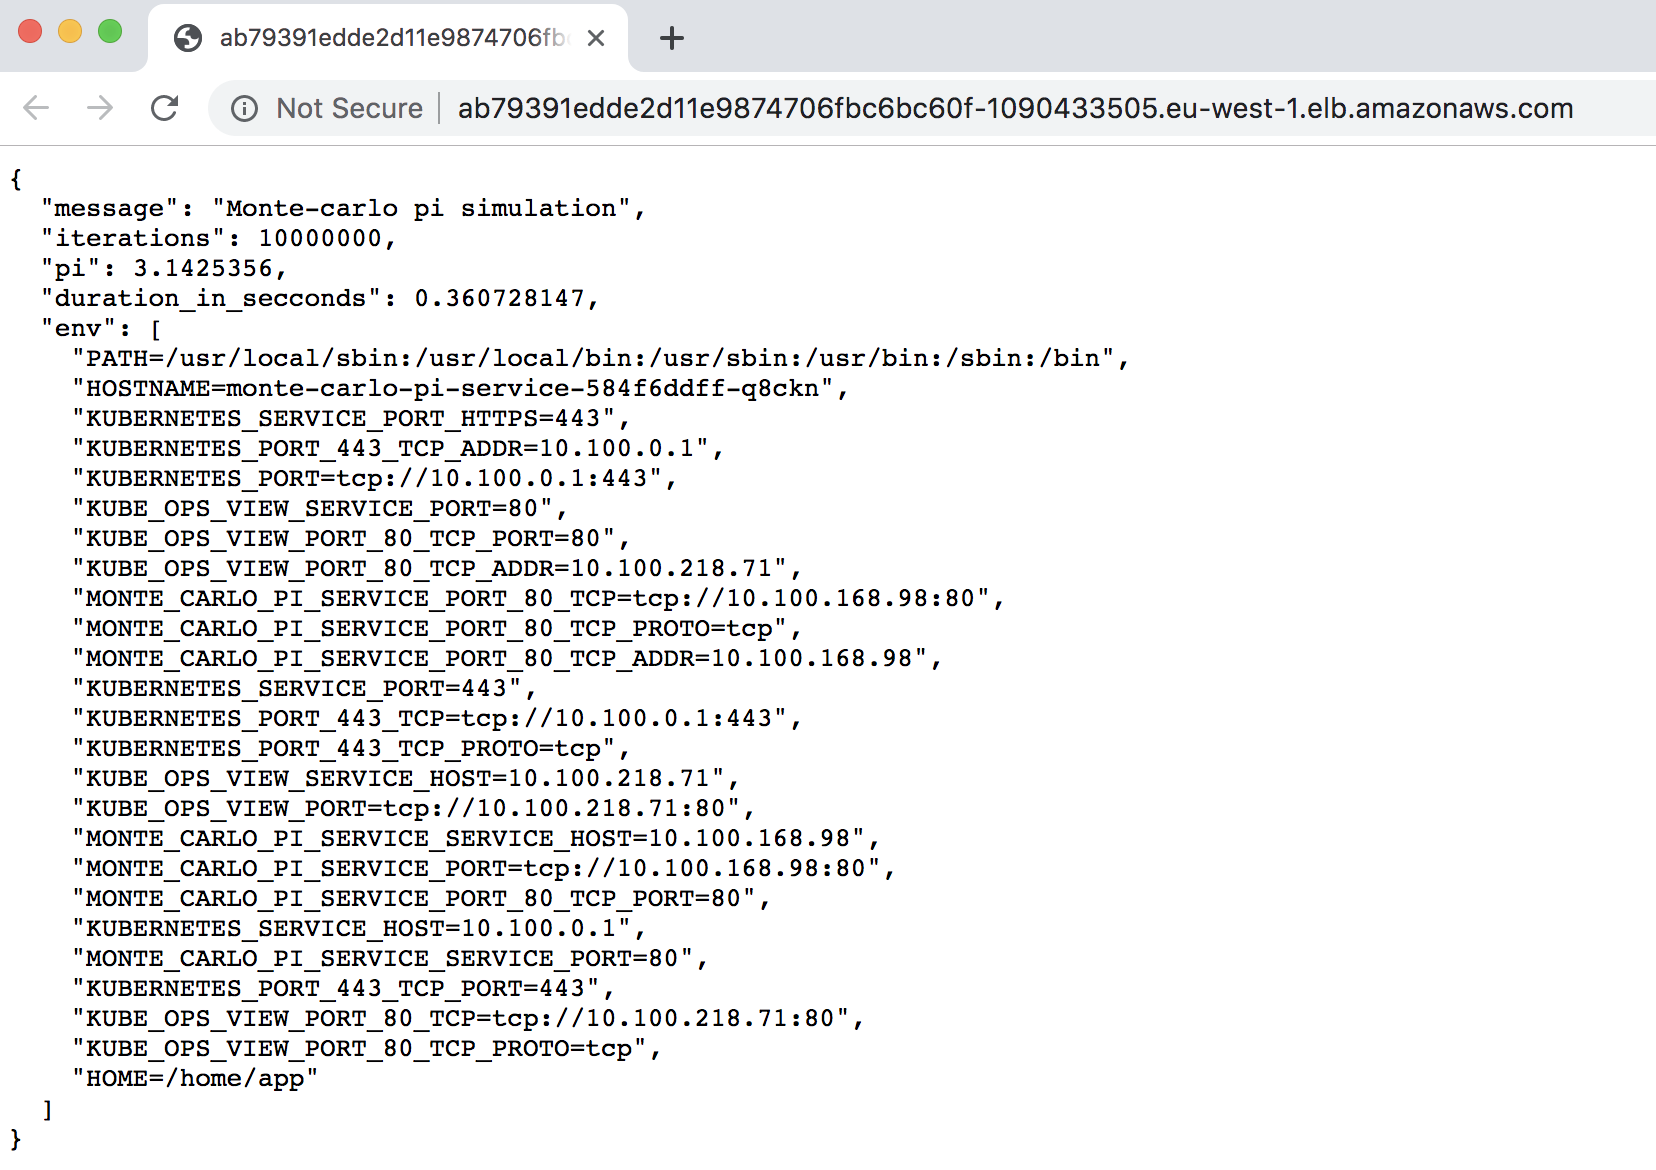
So far we have not exposed any service outside the kube-ops-view. Similar to what we did with kube-ops-view. Once the application has been deployed we can use the following line to find out the external url to access the Monte Carlo Pi approximation service. To get the url of the service:
kubectl get svc monte-carlo-pi-service | tail -n 1 | awk '{ print "monte-carlo-pi-service URL = http://"$4 }'
When running that in your browser you should be able to see the json response provided by the service:

You can also execute a request with the additional parameter from the console:
URL=$(kubectl get svc monte-carlo-pi-service | tail -n 1 | awk '{ print $4 }')
time curl ${URL}/?iterations=100000000
Once you completed the questions above you shoudl be ready to move to the next section where we will configure HPA and prepare ourselves for a dynamic scaling exercise.