Lab 4: Using containers backed by Spot instance in Auto Scaling Groups
You’ve now got a scalable solution using nothing but Spot instances for your CICD systems, your build agents and your test environments – however, you still have some inefficiencies with this setup:
- Your Jenkins master utilizes a relatively low percentage of the CPU resources on the instance types that Jenkins is running on; and
- You still have at least one Jenkins build agent running at all times;
These inefficiencies can be addressed by moving your solution to a container environment that continues to utilize Spot instances. This lab will see you configure the ECS cluster resources that were created by the initial CloudFormation template and migrate your Jenkins master and agents to this cluster.
As was the case with Lab 3, you will need a value from the Outputs tab of the CloudFormation stack that you deployed in the Workshop Preparation - this time, make a note of what the JenkinsIAMRoleARN is.
Click to reveal detailed instructions
- Go to the CloudFormation console (or click here);
- Click on the checkbox associated with the SpotCICDWorkshop stack;
- From the Outputs tab of the SpotCICDWorkshop stack in the CloudFormation console, make note of value associated with the JenkinsIAMUserARN key.
INSPECT THE ECSLAUNCHTEMPLATE LAUNCH TEMPLATE
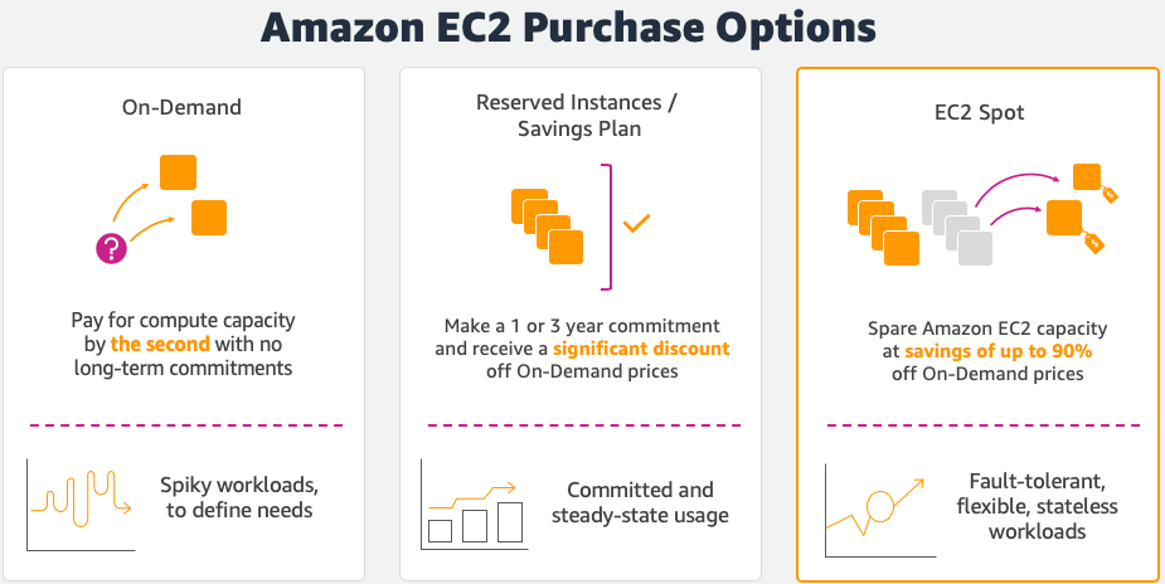
A couple of weeks prior to the 2018 re:Invent conference, AWS launched a new feature for Auto Scaling Groups - the capability to provision Auto Scaling Groups with a mixture of different instance types and different purchasing models. The ECS cluster that you provision in this lab utilises this feature, specifically launching an on-demand instance and a spot instance in the Auto Scaling Group that you create in the next section.
By deploying the Auto Scaling Group in this manner, you can configure a placement constraint on the Jenkins server container in order to have it preferentially run on the on-demand instance and eliminating the drawbacks of having the container running on a spot instance. Setting up a placement constraint in an ECS Task Definition is relatively straightforward, but having the EC2 instance configure a custom attribute within ECS to indicate whether it is a spot instance or not is a little more complex. By inspecting the ECSLaunchTemplate Launch Template, you can see how this is achieved.
Click to reveal detailed instructions
- Go to the EC2 console and select the Launch Templates option from the left pane (or click here);
- Select the launch template with the Launch Template Name of ECSLaunchTemplate. Toward the bottom of the lower pane, expand the Advanced details section and click on the View user data link;
- Inspect the User Data defined in the Launch Template:
- First, the Instance ID needs is obtained by polling the instance metadata;
- Once the Instance ID has been obtained, the user data script issues an EC2 describe-instances call to obtain the Instance Lifecycle. If the instance that this call refers to is a Spot instance, the Instance Lifecycle will be spot, otherwise it will be null;
- Finally, the ECS_INSTANCE_ATTRIBUTES configuration directive is added to the /etc/ecs/ecs.config file, defining the lifecycle custom attribute. When the user data has been processed, the ECS agent will start and register this custom variable with the ECS service.
PROVISION AN AUTO SCALING GROUP FOR YOUR ECS CLUSTER
While the CloudFormation template that was deployed during the Workshop Preparation has already defined the ECS Cluster resources that you’ll utilize in this workshop, you’ll need to create a new Auto Scaling Group to provide the compute resources to the ECS Cluster definition. While you could provision the entire Auto Scaling Group to use EC2 Spot Instances, this walkthrough will guide you through how to configure the Auto Scaling Group to use multiple instance types and purchasing options - a feature that was launched just over a week prior to re:Invent 2018.
- Go to the EC2 console and click on the Auto Scaling groups option from the left frame (or click here);
- Click on the Create Auto Scaling group button;
- The recently released capability to deploy EC2 instances using multiple instance types and purchase options requires the use of Launch Templates, so select this as the Auto Scaling Group parameters that you want to use. Select the ECSLaunchTemplate launch template (which was created by the CloudFormation template deployed during the Workshop Preparation), and then click on the Next Step button.
- At the Configure Auto Scaling group details step of the wizard:
- Give the Group a name of Spot CICD Workshop ECS Auto Scaling Group;
- Change the Fleet Composition to Combine purchase options and instances - Selecting this option should reveal additional choices. The Launch Template selected previously does not specify what purchasing model should be used for these instances and the default option will see on-demand instances launched;
- At the Instance Types section, add t3.large, t2.medium and t2.large instance types to the Auto Scaling Group configuration;
- Remove the tick from the Instances Distribution checkbox so that you can explore the additional configuration options;
- As you don’t have a specific price objective to meet for your ECS cluster, leave the Maximum Spot Price using default bidding. Also leave the Spot Allocation Strategy so that instances are diversified across the 2 lowest priced instances types per Availability Zone (this will typically ensure that the medium-sized instances will almost always be used when instances are launched, but the large instances are able to be used if something unexpected happens to the availability or market price of the medium instances);
- While you could run the entire Auto Scaling Group using Spot instances, it might be more desirable to have a portion of the Auto Scaling Group running on-demand instances, to provide a little more assurance that the container running your Jenkins server will always be running. In order to do this, set the Optional On-Demand Base such that you designate the first 1 instance as On-Demand, and then change the On-Demand Percentage Above Base to be 0% On-Demand and 100% Spot;
- Change the Group size to start with 2 instances;
- Select the Amazon EC2 Spot CICD Workshop VPC from the Network dropdown;
- Within the Subnet field, click on and select each of the three subnets that start with Amazon EC2 Spot CICD Workshop Public Subnet;
- Click on the Next: Configure scaling policies button;
- At the Configure scaling policies step of the wizard, ensure that the Keep this group at its initial size option. In a production environment, it’s likely that you will want to configure scaling policies to ensure that your compute resources grow in line with the number of containers deployed to the cluster, but a group with no scaling policy should be sufficient for this workshop. Click on the Next: Configure Notifications button;
- You will not be setting up any notifications at the Configure Notifications step of the wizard, so simply click on the *Next: Configure Tags button;
- At the Configure Tags step of the wizard, add a tag with a Key of Name and a Value of Spot CICD Workshop ECS Instance, then click on the Review button;
- At the Review step of the wizard, click on the Create Auto Scaling Group button. Once the Auto Scaling Group has been launched, click on the Close button.
MODIFY PERMISSIONS ON THE EFS FILE SYSTEM
You will be deploying the official Jenkins docker image to your ECS cluster which differs slightly from the RPM bundles typically deployed to Amazon Linux systems. One of the differences is that the docker image will ALWAYS run Jenkins using a Linux uid of 1000, as opposed to the incremental uid used in RPM deployments. Because this uid differs, we’ll need to ensure that the EFS file system is configured with the correct permissions to allow our ECS Jenkins Master to read the persisted data.
To do this, stop the Jenkins service on the Spot instance that you crated in the previous lab and set the file system permission of the root of your EFS file system so that the user with uid of 1000, and the group with a gid of 1000 is the owner of all file system objects.
Click to reveal detailed instructions
-
Go to the EC2 console and select the Instances option from the left pane (or click here);
-
Select the instance with the Name tag of *Jenkins Master (Spot) and make a note of it’s current IPv4 Pubic IP.
-
Establish an SSH session to this IP address (For instructions on how to establish an SSH connection to your EC2 instance, please refer to this link) - you’ll need to use the EC2 Key Pair that you generated during the Workshop Preparation to establish connectivity.
-
Stop the Jenkins service by entering the following command:
sudo service jenkins stop
5. The content of JENKINS_HOME is stored under /var/lib/jenkins – execute the following command to set the permissions appropriately (note that this will take a couple of minutes - while it's progressing, commence the next section of this lab):
```bash
sudo chown -R 1000:1000 /var/lib/jenkins
MODIFY THE JENKINS MASTER APPLICATION LOAD BALANCER SO THAT REQUESTS ARE FORWARDED TO THE ECS TARGET GROUP
In order to operate properly with ECS Service Discovery (which is used later in this lab), the CloudFormation template that you deployed in the Workshop Preparation deployed two Application Load Balancer Target Groups - one for instance targets (EC2) and the other for IP address targets (ECS). Given that the Jenkins installation on your Spot instance is now stopped, now is an opportune time to change the configuration of the listener for the JenkinsMasterALB Application Load Balancer to use the JenkinsMasterECSTargetGroup target group.
Click to reveal detailed instructions
- Go to the EC2 console and select the Load Balancers option from the left pane (or click here);
- If it is not selected, select the load balancer named JenkinsMasterALB and click on the Listeners tab in the bottom pane. Then, click on the View/edit rules link;
- Click on the Reorder Rules button (signified by an up arrow next to a down arrow), select rule 2 and click on the Up button to increase its priority. The rule that forwards content to the JenkinsMasterECSTargetGroup should now be at the top of the list - if this is the case, click on the Save button.
MODIFY THE JENKINSMASTER ECS SERVICE TO START A JENKINS MASTER TASK
An ECS Service called SpotCICDWorkshop-ECSServiceJenkinsMaster was provisioned the CloudFormation stack launched during the Workshop Preparation phase, along with the EFS volume that you’re using to persist the contents of JENKINS_HOME. Up until Lab 3, the contents of this EFS volume was empty, which would have prevented a Jenkins Task from starting successfully until the contents of JENKINS_HOME resided on the EFS volume, and no other Jenkins installation had a lock file in place on the volume. Therefore during the CloudFormation deployment, the ECS Service definition was configured to have the desired number of tasks running set to 0. Update the service so that 1 copy of the task is running.
Click to reveal detailed instructions
- Go to the ECS console (or click here) and click on the SpotCICDWorkshopECSCluster link;
- Click on the checkbox of the service with a Service Name that begins with SpotCICDWorkshop-ECSServiceJenkinsMaster, then click on the Update button;
- Change the Number of tasks from 0 to 1, then click on the Next Step button;
- At the Configure network screen, click on the Next Step button. Repeat the same action at the Set Auto Scaling (optional) screen. Finally at the Review screen, click on the Update Service button. Once the service has been updated, click on the View Service button.
VERIFY THE STATUS OF YOUR ALB TARGET GROUP, VERIFY ACCESS TO JENKINS AND RUN A TEST BUILD
Within a few moments of updating the service definition, a new task and container will be launched on one of the ECS cluster nodes (specifically, the on-demand instance within the cluster). The ECS service is configured to attach the running container to the JenkinsMasterECSTargetGroup target group, which is now the target group being used by the Application Load Balancer that you’ve been using to access Jenkins. Verify that the new container has registered with the ALB, then access Jenkins through the ALB and run a test build of the Apache PDFBox project.
Click to reveal detailed instructions
- Go to the EC2 console and click on the Target Groups option from the left frame (or click here);
- Select the checkbox corresponding to the target group named JenkinsMasterECSTargetGroup, then select the Targets tab. You should see one of your Spot CICD Workshop ECS Instance instances with an initial status (it generally takes a couple of minutes for Jenkins to completely start up and for the health check to return a healthy status);
- Refresh the list of targets every minute or so and when the registered target is shown with a healthy status, you should then be able to reload Jenkins through the ALB. Once you can do so, initiate a build of the Apache PDFBox project to ensure that everything is working as expected.
CANCEL THE EC2 SPOT FLEET REQUEST FOR YOUR SELF-HEALING JENKINS SERVER
As you now have Jenkins running from a container, you no longer need the Spot Fleet that you created in Lab 3 - cancel this Spot Fleet request and terminate the instances belonging to the fleet.
Click to reveal detailed instructions
- Go to the EC2 console and click on the Spot Requests option from the left frame (or click here);
- Select the checkbox corresponding to the Spot Fleet request that was created in the previous lab (this should be the Spot Fleet request that has a Capacity of 1 of 1 and a Max price of $0.0456);
- Click the Actions dropdown at the top of the screen and select the Cancel spot request option. At the confirmation dialogue, ensure that the Terminate instances checkbox is selected and click on the Confirm button.
When you launched build agents using Spot instances, you took advantage of the fact that you could access those agents via SSH. However with build agent containers, you won’t be exposing an SSH interface outside of your container. Instead, your build agent containers will initiate a connection to the Jenkins container via the Java Network Launch Protocol (JNLP), via an interface that is addressed using ECS Service Discovery.
- Back at the Jenkins home page, click on the Manage Jenkins link on the left side menu again, and then the Configure System link;
- Scroll down to the Cloud section and under the Spot Fleet Configuration section, click on the Delete Cloud button (the spot build agents will no longer be required now that you’re starting to use resources on your ECS cluster);
- Next, click on the Add a new cloud button followed by the Amazon EC2 Container Service Cloud option;
- In the Amazon EC2 Container Service Cloud section:
- Set SpotCICDWorkshopECSAgents as the Name;
- In the Amazon ECS Credentials dropdown, select the same IAM Access key that you used when configuring your spot build agents;
- Select the eu-west-1 region from the Amazon ECS Region Name dropdown;
- Select the ECS Cluster that has the SpotCICDWorkshopECSCluster suffix from the ECS Cluster dropdown;
- Click on the Advanced button, then set the Alternative Jenkins URL to http://master.jenkins.local:8080 - this is the address (managed through ECS Service Discovery) that the build agents will use to access Jenkins via the internal VPC network;
- Click on the Add button that appears just to the right of the ECS slave templates label;
- Enter ecs-agents into the Label field;
- Type ECSBuildAgent into the Template Name field;
- Enter cloudbees/jnlp-slave-with-java-build-tools into the Docker Image field - this is the Docker image that will be used when launching your build agent containers;
- Set the Hard Memory Reservation to 1536 and the CPU units to *512;
- Click on the Advanced button;
- In the Task Role ARN field, enter the value specified by the JenkinsIAMRoleARN key obtained at the beginning of this lab (it should be of the format arn:aws:iam::account_number:role/SpotCICDWorkshop-IAMRoleJenkins-random_chars).
- Click on the Save button at the bottom of the page.
CANCEL THE EC2 SPOT FLEET REQUEST FOR YOUR BUILD AGENTS
As you now have build agents configured to run from containers, you no longer need the Spot Fleet that you created in Lab 1 - cancel this Spot Fleet request and terminate the instances belonging to the fleet.
Click to reveal detailed instructions
- Go to the EC2 console and click on the Spot Requests option from the left frame (or click here);
- Select the checkbox corresponding to what should be the sole remaining Spot Fleet request;
- Click the Actions dropdown at the top of the screen and select the Cancel spot request option. At the confirmation dialogue, ensure that the Terminate instances checkbox is selected and click on the Confirm button.
As things stand now, your projects in Jenkins won’t be able to be built - you’ve removed all of the EC2 Spot build agents and have statically defined a number of build jobs to use these agents. Recall that when you set up the EC2 Spot build agents, you assigned the spot-agents label to your a number of the build projects to force them to be built on your Spot instances? For this lab, reconfigure the Apache PDFBox build project to use the ecs-agents label and then kick off a test build of this project.
Click to reveal detailed instructions
- Within Jenkins, click on the Jenkins logo in the top left corner of the site – this will take you back to the Jenkins home page. Click on the Apache PDFBox build project link, then click on the Configure link in the left pane of the page;
- Under the General section, change the Label Expression so that it says ecs-agents;
- At the bottom of the screen, click on the Save button;
- Finally, click on the Build Now link on the left side of the screen to initiate a build of this project. Click on the Jenkins logo at the top left corner of the site to go back to the main screen and see how your build progresses on the ECS build agent. One final thing to note is that when running in a container, the build agent will always show up with a suspended status - due to the ephemeral way in which containers are treated by the plugin, as soon as all of the build executors have been consumed in the container, the plugin will mark the agent as suspended so that new agents are deployed in new containers for subsequent build jobs.
PROCEED TO WORKSHOP CLEANUP
Once your Jenkins infrastructure is completely running in your ECS cluster, you’ve completed all of the labs in this workshop. Congratulations! You may now proceed with the Workshop Cleanup.